Pesto Chicken Pizza
February 6, 2013 § 1 Comment
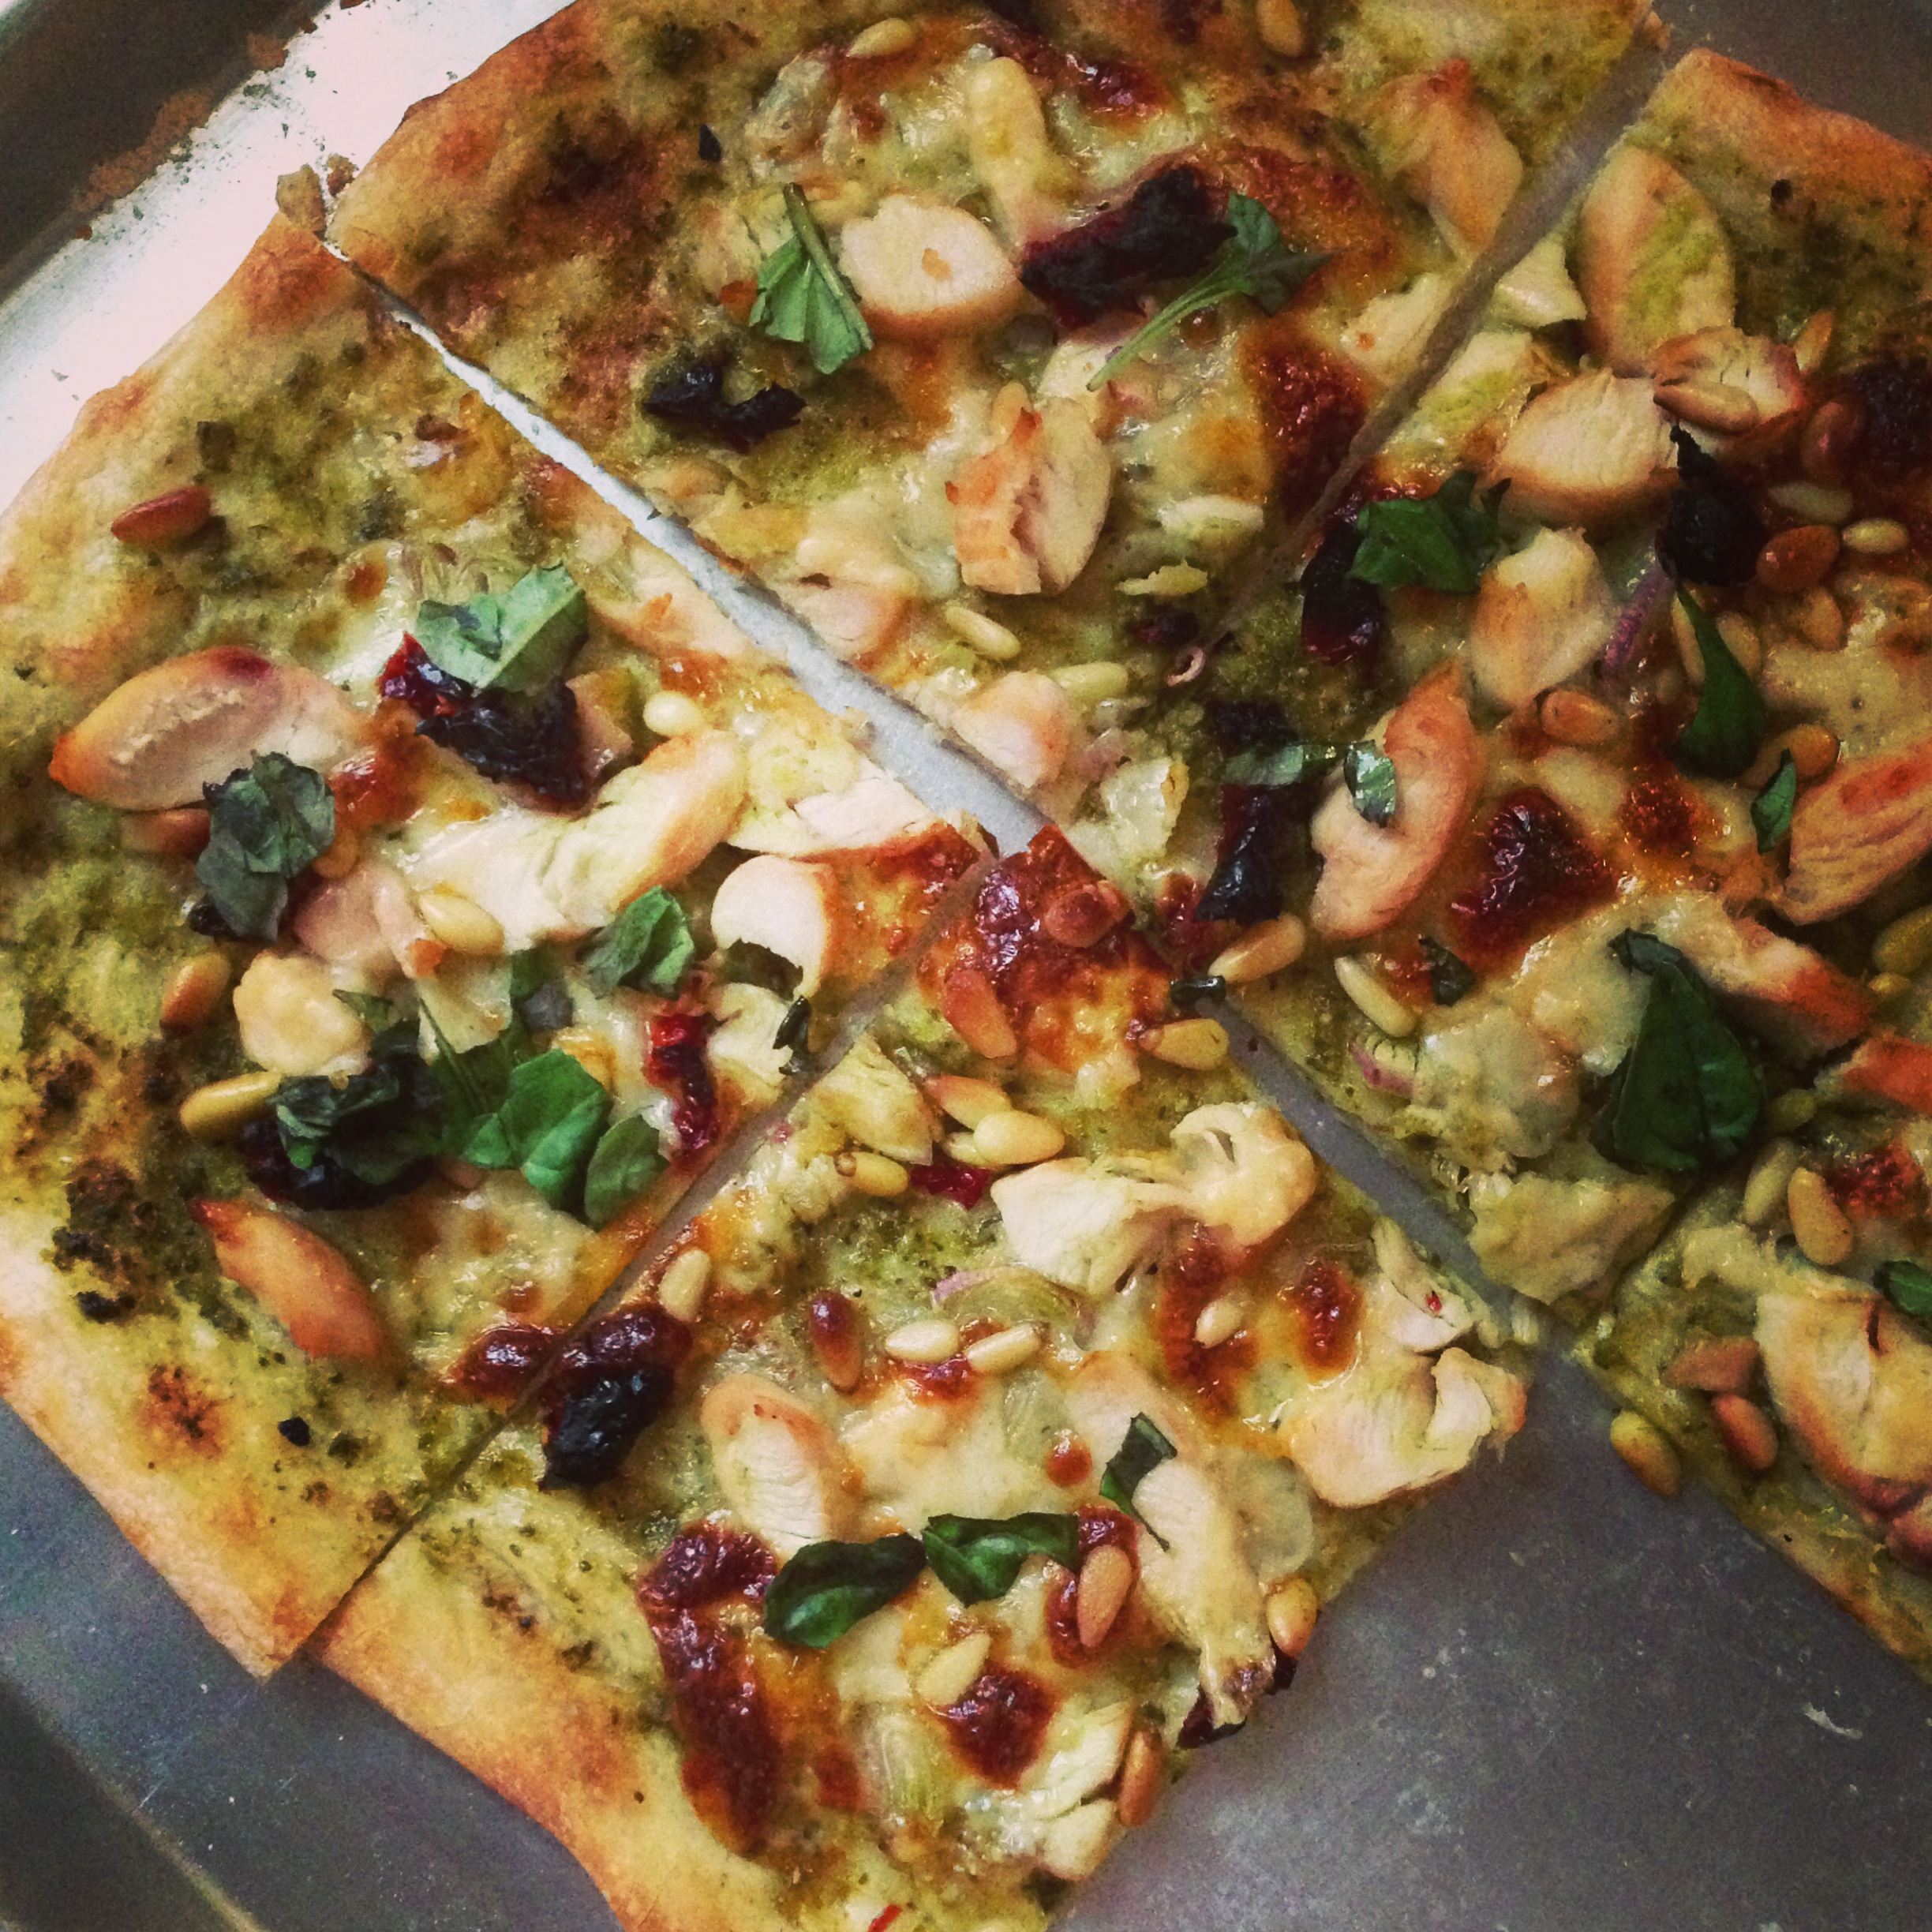
Pesto Chicken Pizza
My husband and I used to eat at CPK (California Pizza Kitchen) a few times a week. Sometimes twice a day!!! My favorites there changed over the years and the last few years it was their thin crust pesto chicken pizza. I LOVED that pizza. Doesn’t matter if I was full on appetizers and bread before my pizza came, the entire pizza had no chance of survival.
Notice how the pizza is referred to in past tense? Well not too long ago they revamped their menu. I had a break from them because I was pregnant with my second baby and was so sick I barely left the house. Anyway, when I managed to make it back there to order the pesto chicken pizza….. It was gone. GONE! I asked the waitress and she verified it was no longer on the menu. They couldn’t even make a close copy with what ingredients they had on hand. I was so sad and could barely eat a few bites of the other pizza she suggested. It was probably half a year since that day and I’ve gone back just two other times. Once for pasta and then recently to see if there’s any pizza they could make to be just a little close to my much missed pizza. They couldn’t do it.
Now when I crave that pizza I have to make it myself. Although the crust isn’t as good as theirs (I still haven’t invested in the whole pizza stone process), its still a pretty tasty pizza. I used the no-knead method for the dough and it’s one of the easiest dough ever!
So if you’re missing CPK’s Pesto Chicken Pizza or just like pesto chicken this is a good pizza to try. Enjoy!
Pizza dough recipe from Handle the Heat and adapted from Bon Appetit.
Ingredients
- 3-3/4 c ap flour
- 1/4 tsp active dry yeast
- 1-1/2 tsp salt
- 1-1/2 c warm water
Combine dry ingredients in a bowl.
Slowly add warm water, mixing with a spoon until all water is incorporated.
Shape dough into a ball and transfer to a clean bowl and cover. Let rise until doubled (up to 18 hrs). I let mine rise overnight.
Transfer dough onto a floured work surface and divide into three equal portions.
For each portion, take the dough and gather the four “corners” to the center to create 4 folds. Turn seam side down and roll into a ball.
Let dough rest, uncovered, for an hour before use.
The other portions can be refrigerated for up to 3 days or frozen for up to a month. Just let it defrost in fridge for a day (if frozen), then sit out at room temperature for 2-3 hours before using.
Pesto Chicken Pizza
Ingredients
- 1 portion pizza dough (see above)
- 1/3 c pesto sauce
- 1/2 c mozzarella cheese, shredded
- 1/4 c Parmesan cheese, shredded
- 1/2 c chicken, cooked and cut into strips
- pine nuts, as much as you like
- sun-dried tomatoes, as much as you like
- basil leaves
Preheat oven to 500-550 degrees. (depends on how high your oven can go)
Shape the dough into about a 12″ circle, or whatever shape it becomes since mine did not want to be a circle.
Spread the pesto sauce on the dough.
Top with ingredients.
Bake for about 10 mins or until the bottom is golden and crisp and cheese is melted.
Top with torn basil leaves.
Chocolate Cupcakes
February 6, 2013 § 3 Comments

Chocolate Covered Strawberry Cupcakes
So it’s been awhile since my last post and I’ve had this in my draft for quite awhile. Long story short, I had my second son. 🙂 Kyle was born four months ago and its been busy ever since. I’m happy to finally be back in the kitchen again (although two kids make for some burnt food and missed ingredients)!
I LOVE this chocolate cake recipe. It’s so chocolatey, moist, rich and super easy.
This recipe is all over the web and it’s been so long that I really can’t remember where I first saw it. I think its from Hershey’s…?
Ingredients
- 1 – 3/4 c ap flour
- 2 c sugar
- 3/4 c cocoa powder
- 2 tsp baking soda
- 1 tsp baking powder
- 1 tsp salt
- 2 eggs
- 1 c buttermilk
- 1/2 c vegetable oil
- 2 tsp vanilla
- 1 c coffee, cooled
Preheat oven to 350 degrees.
Combine dry ingredients in a bowl.
Add eggs, buttermilk, oil and vanilla. Mix to combine.
Add coffee and mix again to combine.
Divide among the cupcake liners. I can get two dozen regular and two dozen mini cupcakes from one batch.
Bake for 15-18 mins. Whenever an inserted toothpick comes out clean.
See! wasn’t that easy??
If you want to make a cake out of it just pour it into greased and floured pans or pan and bake for about 30-35 mins until the toothpick comes out clean.

Oreo Cupcakes

Peanut Butter & Chocolate Cupcakes
Roasted Cauliflower and Asparagus Soup
March 6, 2012 § 4 Comments
")
This is a pretty healthy and filling soup that can be made in one pot (well a baking sheet AND a pot). I’ve only had cauliflower in stir fry and raw, and love both. But this is my new favorite way. As soup and with a lot of cheese! I was skeptical of this recipe because there isn’t that much going into it, but it makes a hearty and creamy soup that could be a meal.
I’ll take this on a cold day with mounds of cheesy, crunchy croutons and some green onions sprinkled on top.
Recipe adapted from closet cooking.
Roasted Cauliflower and Asparagus Soup
Ingredients
- 1 head cauliflower, cut into florets
- 5-6 big stalks of asparagus with tough ends broken off and tips broken into smaller pieces
- 2 tablespoons oil
- salt and pepper to taste
- 1 tbsp oil
- 1 medium onion, diced
- 2 cloves garlic, chopped
- 1 tsp dried thyme
- 3 c vegetable broth
- Parmesan rinds if you have it
- 2 c extra sharp cheddar, shredded
- 1 c milk
- salt and pepper to taste
Preheat oven to 400 degrees.
Toss the cauliflower florets, asparagus, oil, salt and pepper and arrange them on a single layer on a large baking sheet.
Roast for 30 mins.
Heat the oil in a pot on medium heat.
Add the onion and saute until tender, about 5-7 minutes.
Add the garlic and thyme and saute until fragrant, about a minute.
Add the broth, cauliflower, asparagus and parm rinds and bring to a boil, reduce the heat and simmer, covered, for 20 minutes.
Take out the Parmesan rind.
Puree the soup until it reaches your desired consistency with a stick blender. (I didn’t have this so I did this in batches in a food processor)
Mix in the cheese, let it melt and season with salt and pepper.
Mix in the milk and remove from heat.
Thai Tomato Basil Turkey
February 29, 2012 § Leave a comment
")
One of my favorite dishes at Thai restaurants is the Mint Leaf Chicken. Flavorful ground meat, fried egg with runny yolks, and rice to sop it all up. Heaven on a plate. 🙂
This version has tomato paste in it just because I love tomato-y foods. If you omit that, its pretty close to the Mint Leaf Chicken dish you order at restaurants. Super easy to make (all in one pan, even the fried egg if you give it a quick wipe before frying) and faster than going out.
Ingredients
- 1.25 lb ground lean turkey
- 4 cloves garlic, minced
- 3 shallots, diced small
- 6 kaffir lime leaves
- 1/2 tsp crushed red pepper
- juice from 1/2 a lime
- 1/4 medium yellow onion, about 1″ strips
- 1/2 red bell pepper, about 1″ strips
- 2 tsp soy sauce
- 3 tbsp tomato paste (or ketchup)
- 1 1/2 tbsp fish sauce
- 1 c fresh Thai basil, whole leaves
In an oiled pan over medium heat, add garlic and cook till fragrant, about 1-2 mins.
Add shallots, cook for another 2-3 mins.
Add kaffir lime leaves and crushed red pepper, cook for about 1 min, making sure to squish the leaves as you move it around in the pan.
Turn the heat up to medium high or high, depending on your stoves heat. I used high, you could really hear it sizzle and pop.
Add the turkey, break up and cook until no longer pink and it is in small crumbles.
Add lime juice, onions, peppers, soy sauce, and tomato paste. Stir to mix well.
Add fish sauce and basil leaves, stir to incorporate.
Serve with a fried egg on top (with runny yolks of course) and some quinoa, rice, or whatever you like on the side. 🙂
Also super yummy if you serve it with raw whole cabbage leaves (like lettuce wraps), little green eggplants, or cucumber slices as Hors d’oeuvres!
")
Cheesy Dog Biscuits
February 27, 2012 § 2 Comments
")
You can never have enough treats for your pets, especially homemade ones. I’ve been wanting to make Charlie (my rottie) and Lucky (my brothers shihtzu) fresh treats for awhile and now realize how quick and easy it is! The first ones I made were a peanut butter and banana batch, which went really quick. This is a cheddar cheese treat. Charlie loved (but charlie literally eats everything), Lucky not as much. So maybe I’ll try a teeny tiny bit of bacon in it to see if Lucky takes to it more. With bacon I think I might take to it. ;P
These are super easy to make and smell great while baking. I’m still having trouble getting the biscuits to get super crunchy and dry like the commercial stuff. Next time I’m planning to double bake them like a biscotti and hopefully they get crazy crunchy.
Recipe adapted from All Recipes: Dog Treats 1 by doughmama
Cheesy Dog Biscuits
Ingredients
- 1 c rolled oats
- 1/3 c applesauce
- 1 c hot chicken stock
- 3/4 c ground flax
- 1/2 c milk
- 1 c shredded cheddar cheese
- 1 egg, beaten
- 2 – 3 c whole wheat flour
Preheat oven to 325 degrees.
In a large bowl, combine rolled oats, applesauce, and stock.
Let stand 10 minutes.
Thoroughly stir in flax, milk, cheese, and egg.
Mix in flour, 1 cup at a time, until a stiff dough has formed.
Knead dough on a lightly floured surface, mixing in additional flour as necessary until dough is smooth and no longer sticky.
Roll or pat out dough to 1/2″ thickness. Cut with cookie cutter or with a knife, and place 1/2 inch apart onto parchment lined cookie sheets.
Bake 50 minutes to an hour in the preheated oven, until golden brown.
Cool before serving. Store in a loosely covered container. You can freeze in a airtight container if you won’t be using it all within a week or two.
Choux Pastry Steps in Pictures
February 25, 2012 § Leave a comment
")
I’ve decided to try to take pictures of the choux pastry in the making since I had questions from my original post awhile back. I think I said I was going to time myself on the steps, but with a toddler practically smacking me for attention, it didn’t work out that way. But I do have pictures, except for one, which was the one I really wanted to get….next time?
These pastries are so easy to make and can be filled with so many different things. This time I had some leftover meyer lemon cheesecake (the crust wasn’t working for me so I scraped the cheesecake out and piped it into my choux pastries). I agree with one of my reader about this recipe maybe using too much butter, so next time I might switch to just using oil. Healthier and lighter maybe. We’ll see how that goes.
Choux Pastry (recipe found here)
1. In a saucepan over medium heat, bring the milk, water, and butter to a boil.
")
2. Reduce heat to medium-low and add flour mixture all at once. Immediately start stirring with a wooden spoon until mixture becomes a ball. (This is where I described it wrong, it doesn’t really become like a round ball, but it pulls away from the sides of the pan and moves with the spoon. More like a mound than a ball.) This is the picture I really wanted to get, but didn’t. So when I do, I’ll add it to this post as an update.
3. Transfer ball to a bowl and beat it with a wooden spoon to cool the paste. Add eggs one at a time making sure to fully incorporate each one before adding more. (The amount of eggs you need will vary, beat one at a time until you get a paste like consistency that holds it’s shape when piped.) Here is how it looked after each egg addition:
1 egg
")
2 eggs
")
3 eggs
")
4 eggs (I stopped at 4)
")
4. Transfer dough to a large pastry bag fitted with a large open tip (I used a large star tip). Pipe onto parchment lined sheet pans.
")
5. Bake for 10 minutes.Reduce the heat to 350 degrees and bake another 30 minutes.
")
")
")
6. Allow the pastries to cool before filling. If you’re making these ahead, place in an airtight container in the fridge after completely cooled and reheat in the oven for a few minutes to crisp them back up. (350 degrees for like 4-5 mins is what I did)
Fettuccine Alfredo
February 25, 2012 § Leave a comment
")
This dish is NOT for the health conscience. Every once in awhile I’d order this dish and not even think about it being an unhealthy dish. (I know its obvious, but I choose not to think like that. Haha.)
Now that I’ve made a fettuccine alfredo dish, I think I’ll limit myself to maybe a few times a year to enjoy. So yummy, so rich, but wow, it’s pretty much butter and cheese! I decided to top mine with grilled chicken breash, sauteed mushrooms, and arugula. There’s no way I could eat it plain. The arugula made it so good, it gets wilted when mixed in and gives it a peppery fresh taste. Awesome.
Fettuccine Alfredo (adapted from cbsop.com)
Ingredients:
- 18 oz fettuccine, cooked, drained and hot
- 2 sticks butter, cut in small cubes
- 3 1/4 cups grated Parmesan Cheese
- 2 tsp garlic powder
- 1 tsp pepper
Bring a pot of salted water to a boil.
Add pasta and cook according to package directions.
Drain pasta, reserving about a cup of the pasta water.
Place pasta back in pot, mix in butter and garlic powder until butter is all melted.
Add cheese and pepper, toss to distribute evenly.
Use pasta water to thin out if it gets too thick. add about 1/4 c at a time.
Serve immediately, with or without some toppings.
Chicken and Mushroom Pesto Pizza
February 25, 2012 § 2 Comments
")
This is the easiest and quickest pizza dough ever. EVER.
I found this recipe on Little Space (link below) and couldn’t wait to try it. It’s not the crisp, hole-y pizza dough that you get from the good pizza places or from other recipes, but its so simple and is really good. Almost focaccia bread like. Actually, if you mixed in some rosemary and topped it with thin sliced onions it’d make a super yummy bread appetizer. Next time. 🙂
Chicken and Mushroom Pesto Pizza (pizza dough from Little Space)
Ingredients
- 1 packet yeast
- 1 c warm water
- 2 1/2 c flour
- 1 tsp honey
- 1 tsp salt
- 2 tbsp oil
- grilled chicken breast
- sliced mushrooms
- 1/4 c pesto sauce (homemade or store bought, I used store bought)
- 1/2 c mozzarella cheese
Preheat oven to 400 degrees.
In a large bowl, combine the yeast and water and stir until yeast dissolves.
Add the flour, honey, salt and oil. Stir to combine, first with a wooden spoon then use your hands to knead it together.
Let dough rest for 10 mins.
Line baking sheet with parchment. (mine are 18″x13″ and it fills up more than half if I want a 1/2″ crust)
Press dough into pan to shape and thickness you want.
Top with sauce, then chicken and mushrooms, and then cheese.
Bake for about 30 mins or until crust is golden and cheese is bubbly.
Turkey Quinoa Meatballs with Mashed Potatoes and Cheesy Pasta
February 25, 2012 § Leave a comment
")
Nothing says comfort like meatloaf, especially the ones with a thick slather of tomato sauce. Seems like not many people are that into it lately. I love how versatile it is, you can add really any spices, meats, and veggies to suit your taste.
Originally I planned to make a turkey and quinoa meatloaf, but figured meatballs are way more fun and easier for little hands. My son’s, not mine. Haha.
Also a note to myself for next time and to whoever might try to make these recipes….it makes a ton. I ended up with like 8 cups of pasta, a huge bucket of potatoes (more like 8-9 cups, but just seemed like sooo much more at the time), and 24 1.5″ to 2″ meatballs. You end up with about a cup of sauce, which is enough to spread over all the meatballs and have it drip all over the potatoes. Yummm….. 😛
Turkey Quinoa Meatballs
Ingredients
- 1 1/4 lb ground lean turkey
- 3/4 c cooked quinoa
- 1/2 c shredded carrot
- 2 lg eggs, lightly beaten
- 1/2 tsp garlic powder
- 1/2 tsp salt
- 1/4 c fresh basil, cut into thin strips (or 1/2 to 1 tsp dried basil, depending on your preference.)
- 1/4 tsp pepper
- 1 c Italian breadcrumbs
- 2/3 c ketchup
- 4 tsp brown sugar
- 2 tsp Dijon mustard
- 4 tsp tomato paste
- 2 tsp Worcestershire sauce
Fluff/loosen the turkey with a fork.
Add all ingredients from the quinoa to the pepper, mix well, but don’t compress mixture.
Add breadcrumbs and mix to incorporate.
Shape mixture into 24 balls. Each are about 1.5-2 inches.
Place on parchment lined baking sheet.
Prepare glaze: mix ketchup, brown sugar, mustard, tomato paste, and Worcestershire together.
Brush or pour tomato sauce over meatballs.
Bake for 40 mins.
Mashed Red Potatoes
Ingredients
- 3 lbs red potatoes, unpeeled and cubed into 1 – 1.5 inch pieces
- 2 tsp salt
- 1 c milk
- 1/4 lb unsalted butter
- 1 c sour cream (1/2 c would be good, but my husband loves sour cream, so it became a whole cup)
- 1/2 tsp pepper
Boil potatoes until soft, about 15 mins.
Drain and transfer to a large mixing bowl and mash with fork to desired consistency.
Heat milk and butter in a small saucepan until butter is melted.
Mix in the milk mixture.
Fold in sour cream, salt and pepper.
")
Cheesy Stove Top Pasta (adapted from Evil Shenanigans)
Ingredients
- 16 oz macaroni, or any small pasta
- 1 tbsp butter
- 1 c milk
- 1 1/2 c freshly grated cheddar cheese
- 1 egg, beaten
- 1 teaspoon Dijon mustard
- 1/4 teaspoon red pepper
- 1 tsp sriracha sauce
- 1/4 tsp pepper
Boil the pasta according to package directions
Drain and pour back into the cooking pot.
Over medium-low heat, add the butter and stir until melted.
Mix the egg, milk, and spices and pour over the pasta.
Stir until it begins to thicken, about three to five minutes.
Remove the pan from the heat then add the cheese.
Mix well so cheese melts.
Taro Coconut Cake with Whipped Cream Frosting
February 25, 2012 § Leave a comment
")
My dad’s reaction to this cake cracked me up! I made this taro coconut cake for my husbands birthday and when I took it out of the cake box my dad said “did you bake it yet??”. Hahah, I guess I should have decorated it a bit more, but I love homey looking cakes. His next comment after taking a bite was “it tastes good, not like how it looks!”. Again, next time more decoration. He was looking for the borders and rosettes, etc like the cakes in the stores, which I personally am not a fan of.
Anyway, this cake got really good reviews and was really moist and not overly sweet. It looks like it takes a lot of time because of the separate parts, but just make the buttercream and filling the day before and set it out to get to room temp before assembling. Easy peasy.
Also, you can definitely make double to triple the buttercream to use it as icing instead of the whip cream, just know it will be a pretty sweet cake. Whip cream makes a light, slightly sweet frosting.
Coconut Cake (adapted from black dog food blog)
Ingredients
- 2 c all purpose flour
- 2 c sugar
- 2 tsp baking soda
- 1 tsp baking powder
- 1 tsp salt
- 1 c buttermilk, shaken
- 1/2 c vegetable oil
- 2 extra-large eggs, at room temperature
- 1 tsp pure vanilla extract
- 1 tsp pure almond extract
- 1 c hot coconut milk (microwave it for 30 secs)
Preheat oven to 350 degrees.
In a bowl, mix dry ingredients.
In another bowl, whisk together all wet ingredients except the coconut milk.
Whisk dry ingredients into the wet.
Stir in coconut milk.
Divide mixture between two 9″ pans lined with parchment paper.
Bake for 25-30 mins or until inserted toothpick comes out clean.
Let cool in pan for 30 mins.
Taro Meringue Buttercream (adapted from lulu at home)
Ingredients
- 3 large egg whites
- 1/2 c granulated sugar
- 2 sticks unsalted butter, softened
- 1 tsp vanilla extract
- 3 tsp taro powder
- pinch of salt
In a mixing bowl over a pot with simmering water, beat eggs and sugar until the sugar is dissolved and the eggs are hot to the touch.
Remove from heat and continue beating with mixer until soft peaks form.
Beat in butter, a few tablespoons at a time, until all incorporated and smooth.
Add the rest of the ingredients and beat until incorporated.
Set aside or refrigerate to use later.
Taro Paste Filling (adapted from Corner Cafe)
Ingredients
- 1 lb taro root
- 1/2 c sugar
- 1/4 tsp salt
Wash, peel, and cut the taro into thin slices.
Boil the taro in a pot/pan filled with just enough water to cover all pieces entirely. If the water dries up before the taro is soft you can just add more water.
If it is soft and there is still water in the pot/pan, pour out the water or cook it to dry out.
Mash taro with a fork until you get the consistency desired. (I did this in the pot with the heat off.)
With heat on medium, add sugar and salt, cook until sugar dissolves.
Set aside until ready to use. (I cooled and refrigerated this the day before making the cake part. Same with the buttercream.)
Whipped Cream Frosting
Ingredients
- 1 c heavy whipping cream
- 1/4 c powdered sugar
- 1 tsp vanilla
- 1 tsp unflavored gelatin
- 2 tsp cold water
Place mixing bowl and beaters in the fridge at least 15 mins before starting.
Beat cream in bowl until foamy.
Add sugar and beat until soft peaks form.
Mix gelatin with the water.
Add gelatin mixture and vanilla, beat until fluffy and whip cream-y. 🙂
Assembly
Run knife along the sides of the cake pan to loosen cake before taking them out.
Cut each cake in half horizontally so you get two full circles out of each cake. (Obvious I know, but just incase someone gets mad at me because they cut their cakes in half and have two half circles. :))
Place one layer on your plate.
Spread half of the buttercream on top.
Top with another cake layer.
Spread taro paste on top of that layer.
Place another cake layer on top of that.
Spread remaining buttercream on top.
Top with the last cake layer.
Frost with whipped cream frosting.
")
